
Chairs seem simple enough to move, right? Wrong. I’ve seen too many dining sets show up at new places with scratched legs, busted spindles, and frames that wobble like they’re drunk. Whether you’re doing it yourself or bringing in a reliable moving company to help, knowing the right way to pack chairs keeps you from unpacking a disaster. We’re talking materials that actually protect stuff, how to take chairs apart without losing half the screws, wrapping techniques that prevent damage, loading them so they don’t become projectiles in the truck, and putting everything back together without a meltdown. Do it right, and you’re sitting pretty. Do it wrong and you’re eating dinner standing up.
Choosing the Right Packing Materials
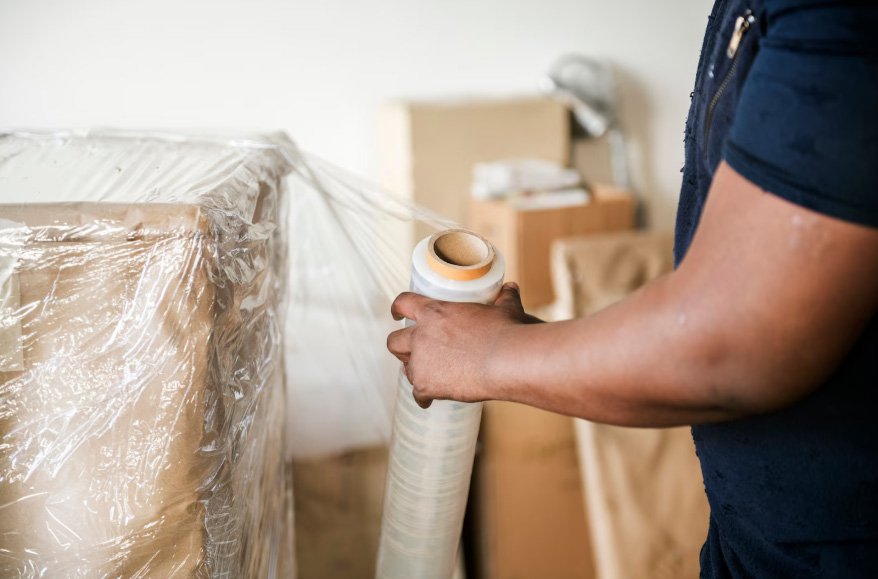
Don’t cheap out on supplies. Just don’t. Those thin moving blankets from the discount store won’t cut it when your antique dining chair is sliding around the truck bed. Get actual furniture pads or quality moving blankets that have some thickness to them. Bubble wrap handles the delicate bits – legs, arms, fancy carved details that’ll snap off if you look at them wrong. Packing paper works too if bubble wrap feels excessive.
Box selection matters more than people think. Too big, and your chair parts rattle around like dice in a cup. Too small and you’re forcing lids shut with your knee while everything pops back open. Match the box to what you’re packing. And for the love of everything, get proper packing tape. Not that dollar store garbage that peels off when it gets warm. The heavy-duty stuff that actually stays stuck.
Good materials aren’t just about protection – they’re about not having to replace furniture at your new place because you tried to save fifteen bucks on bubble wrap.
Disassembling Chairs for Easy Packing
Flip that chair over. Most of them come apart way easier than you’d think, and moving assembled chairs is asking for broken legs – the furniture kind, hopefully not yours. Look for screws or bolts underneath holding everything together. You’ll need a screwdriver or Allen wrench, depending on what you’re working with.
Here’s where people mess up – they take all the hardware out and toss it in a box, thinking they’ll remember which screw goes where. You won’t. Grab a ziplock bag, label it “kitchen chair 1” or whatever, and drop every single fastener in there as you remove it. Tape that bag to the chair seat or inside the box with those parts.
Pull off cushions and seat pads, too. They pack better separately, and you don’t risk ripping fabric on exposed hardware. The whole point here is to make pieces smaller and safer to transport. Plus, chairs take up way less space when they’re broken down. You’ll actually fit other stuff in the truck instead of hauling air.
Properly Wrapping Chair Components
Each piece gets its own wrap job. Seat, legs, backrest – treat them like individual items that hate each other and can’t touch. Bubble wrap works great for most chairs. Moving blankets handle bigger, sturdier pieces. Furniture pads are clutch for anything with a finish you care about.
Pay attention to metal parts. They’re scratch machines waiting to ruin your other stuff. Cover them completely. The same goes for decorative elements – those carved details or spindles that make chairs look nice also make them fragile as hell.
Tape keeps everything in place. Or use plastic wrap to hold the protective layer where you want it. Chair legs are weird to pack because they’re long and awkward. Cardboard sleeves help a ton here – just cut some cardboard to size, wrap it around the leg, and tape it up. Instant protection that won’t shift around.
Label every wrapped bundle. “Chair 2 – left front leg” sounds excessive until you’re staring at twelve identical wrapped pieces with no idea what’s what. Trust me on this.
Securing Chairs in the Moving Truck
Stand chairs up against the truck walls. That’s their natural position and how they’re designed to handle stress. Lying them flat or stacking them invites damage. Get them upright, get them stable, then lock them down.
Ratchet straps are your best friend here. Loop them through or around the chair legs and hook them into the truck’s tie-down points. Tighten until nothing budges – you should be able to push on the chair and have zero movement. Rope works if that’s what you’ve got, but straps are way easier to get tight enough.
Stick padding between chairs. Even wrapped chairs will rub against each other and wear through the protection over a long haul. Old blankets, foam, whatever you’ve got. If you’re packing disassembled parts in boxes, wedge those between bigger furniture to keep them from sliding. Loose boxes become battering rams on the highway.
The goal is opening the truck at your new place and having everything exactly where you left it. Not scattered across the cargo area in pieces.
Labeling Packed Chair Parts
You need a system, or reassembly becomes a nightmare. Color-coded stickers work – blue for dining set, red for office chairs, whatever makes sense to you. One glance and you know which parts go together.
Numbers help too, especially if you’ve got multiple identical chairs. “Chair 1, piece A” might seem overkill, but it’s not. Make a quick list of what’s in each box – doesn’t need to be fancy, just enough so you’re not opening every box looking for the right backrest.
Take photos before you start dismantling anything. Seriously. Pull out your phone and snap pictures from different angles showing how everything connects. In the future, you will be grateful when you can’t remember if that bracket faces in or out. Write notes on your list if something’s tricky – “silver screws go in the back, black ones in front” saves you from trial and error later.
A better labeling system means faster setup at the new place. That’s more time actually enjoying your space instead of playing furniture Tetris with assembly instructions you never had.
Safely Unpacking and Assembling Chairs
Dump everything out where you can see it. Seriously, spread all the parts and hardware across the floor or a table. Check that nothing’s missing and look for damage before you start screwing things together. Finding problems after assembly is way more annoying.
Got those photos you took? Pull them up. Reference your parts list. Start with the base or frame – whatever gives you a stable foundation to build on. Add the seat, then the backrest, then arms if your chairs have them. Work logically from bottom to top.
Hand-tighten everything first so you can adjust if something’s not lining up right. Then go back with your screwdriver or wrench and tighten properly. Not gorilla-strong where you strip threads, just firm enough that nothing wiggles.
Test each chair before you call it done. Sit in it. Lean back. Rock it side to side. If something feels off, it probably is. Better to fix it now than have a chair collapse during dinner with guests over. Nobody wants to be that person explaining why Uncle Bob is on the floor covered in spaghetti.
Related Topics:
- How Long Does It Really Take to Clean an Apartment Before Moving In
- How to Properly Pack a Glass Table Top for Safe Moving